Use Claude Desktop for the most reliable connection. The web version (claude.ai) works too, but it can time out on slower connections — if something stalls, switch to Desktop.
Step 1 — Generate your connection key
In your Ryze dashboard, open the Ryze MCP (Claude Connector) section at app.get-ryze.ai/integrations. Under Connection keys, name the key (e.g. “Claude Desktop”), click Generate Key, and copy it.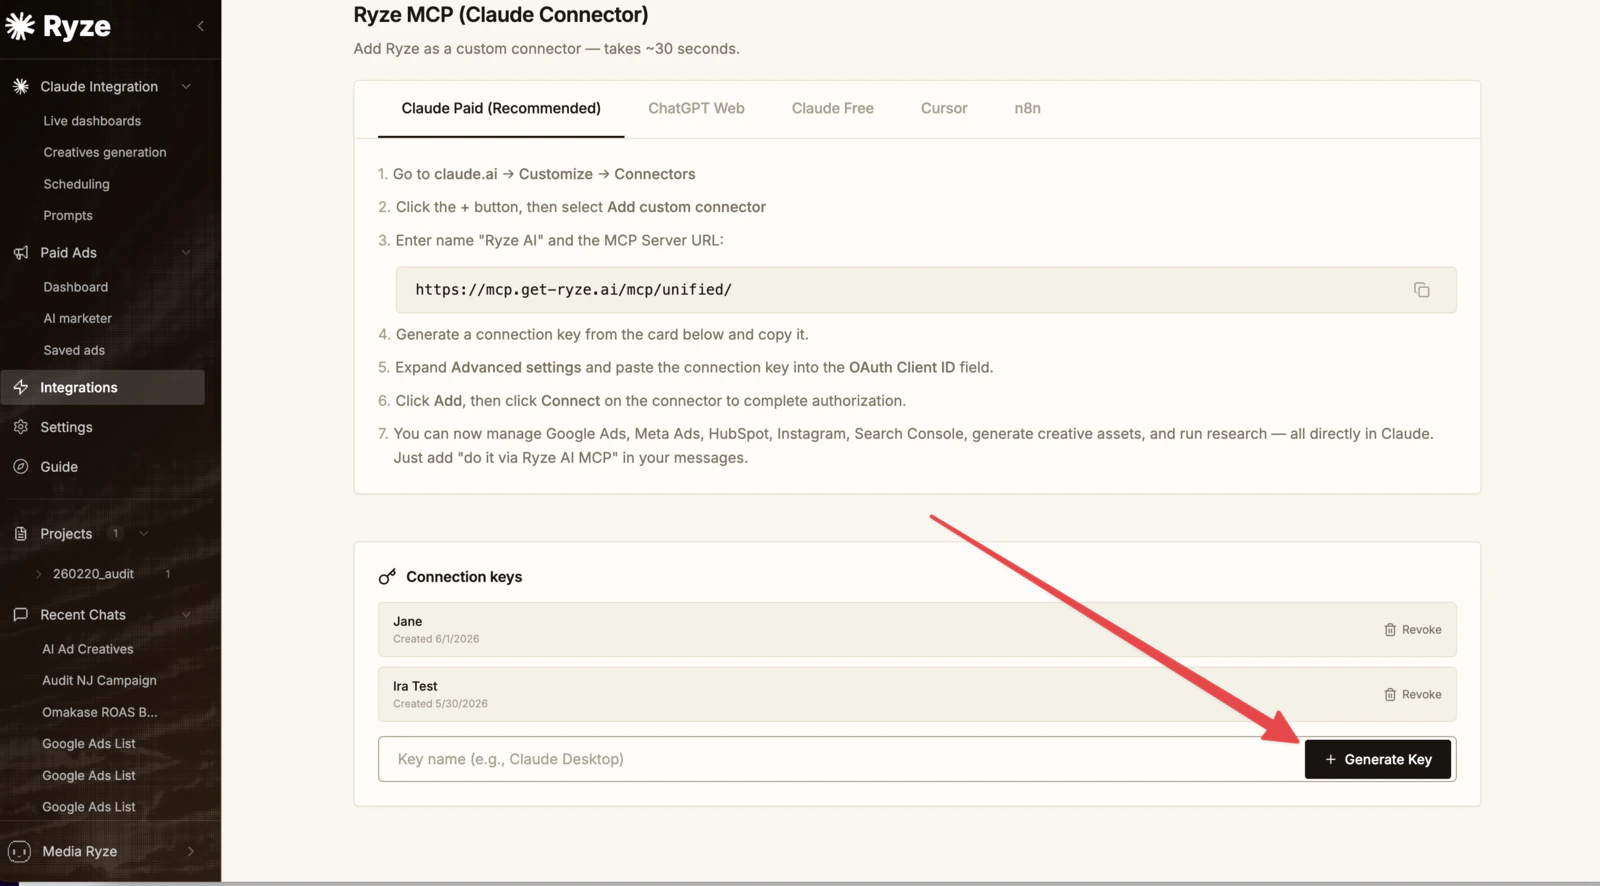
Step 2 — Add the connector in Claude
1
Open Settings
Click your account menu (bottom-left) and choose Settings.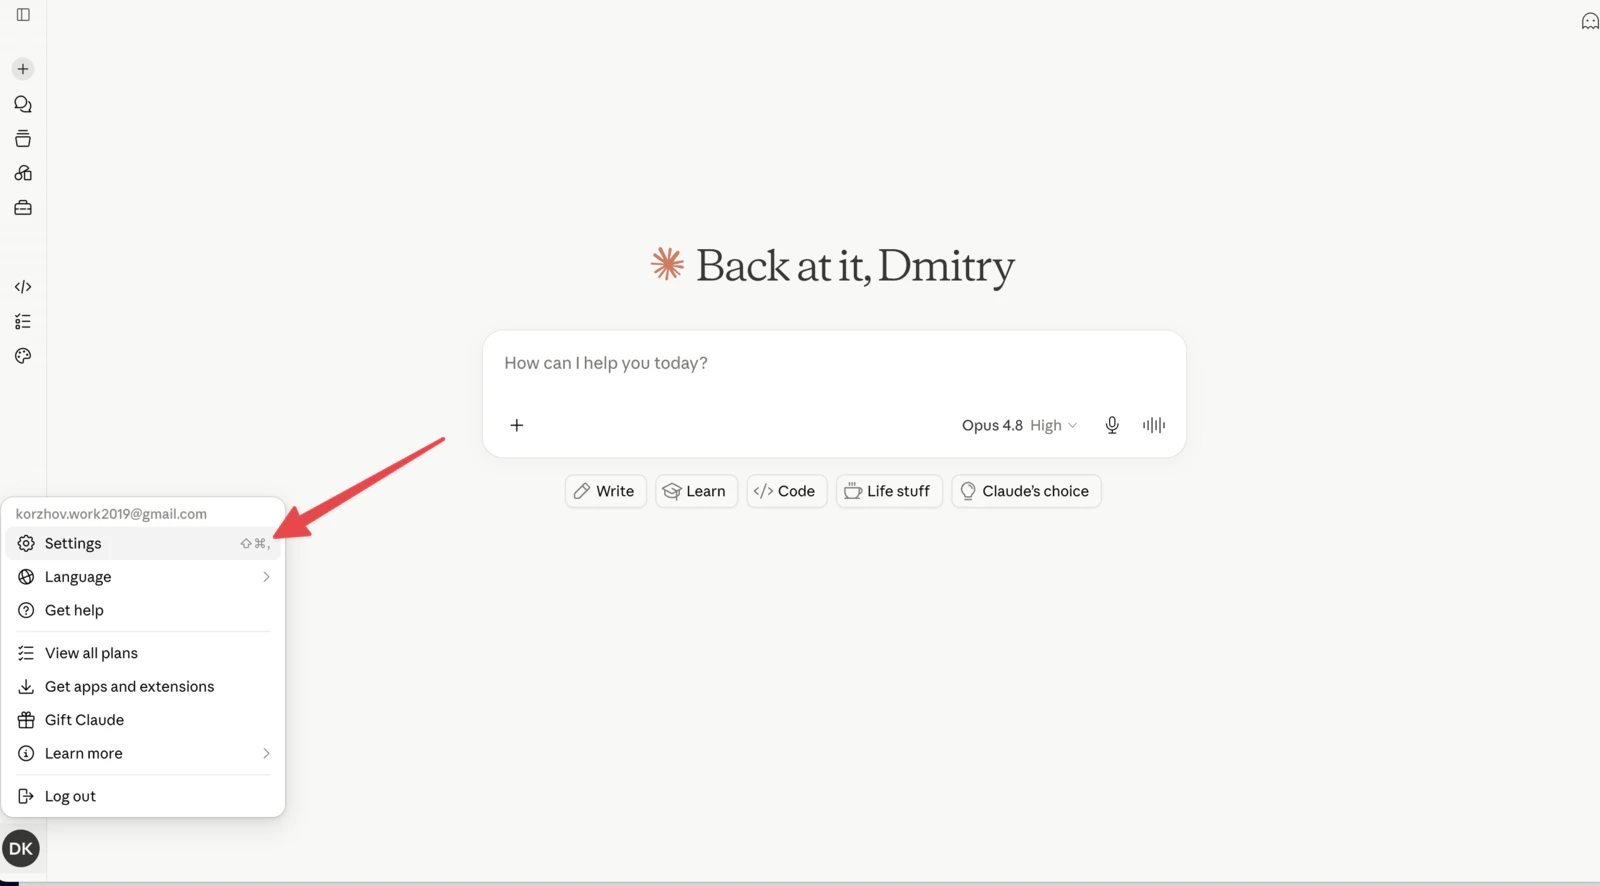
2
Go to Connectors → Customize
Open Connectors. They now live under Customize — click that link.
3
Add a custom connector
In Customize → Connectors, click the + to add one.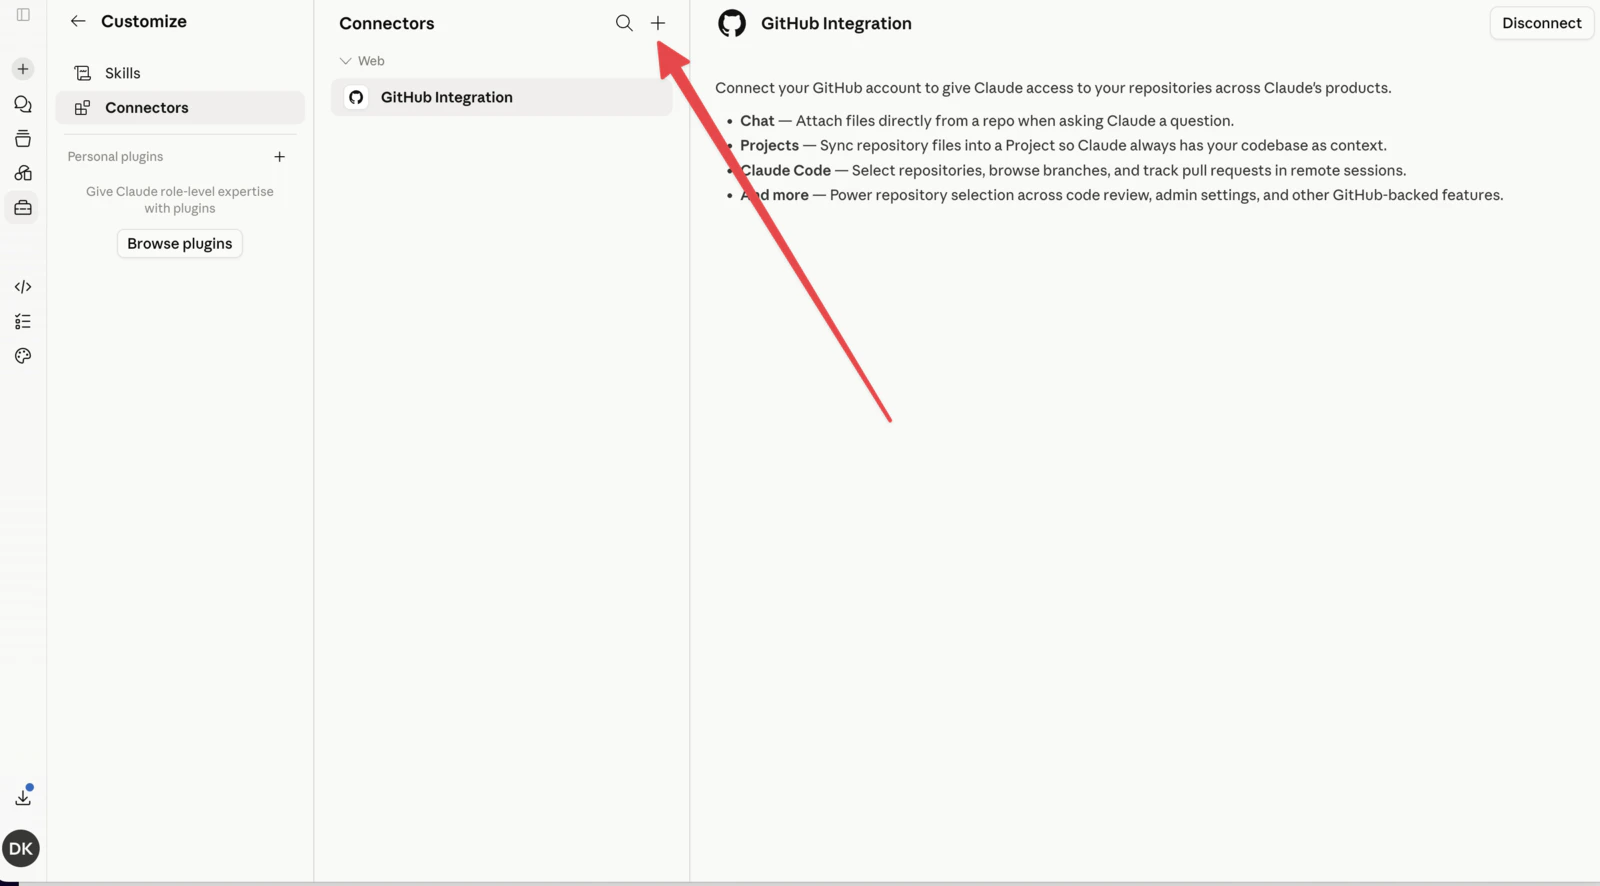
4
Enter the details
Name it Ryze AI and paste the URL 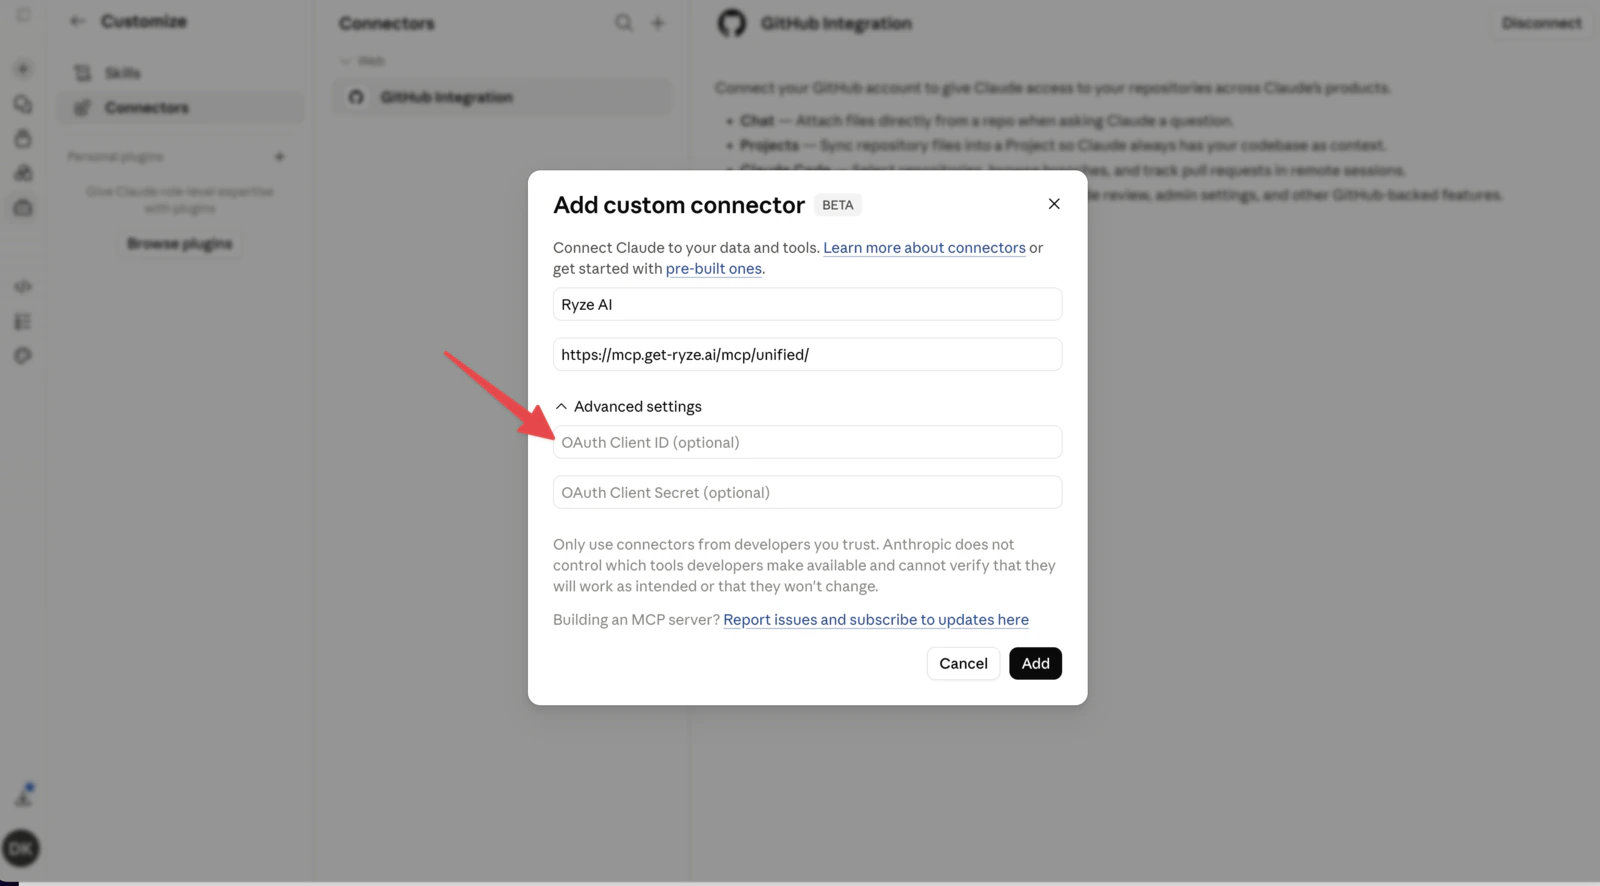
https://mcp.get-ryze.ai/mcp/unified/. Expand Advanced settings and paste your connection key into the OAuth Client ID field, then click Add.Step 3 — Verify it works
Open Customize → Connectors and select Ryze AI. A connected connector shows the Ryze URL and a long list of available tools.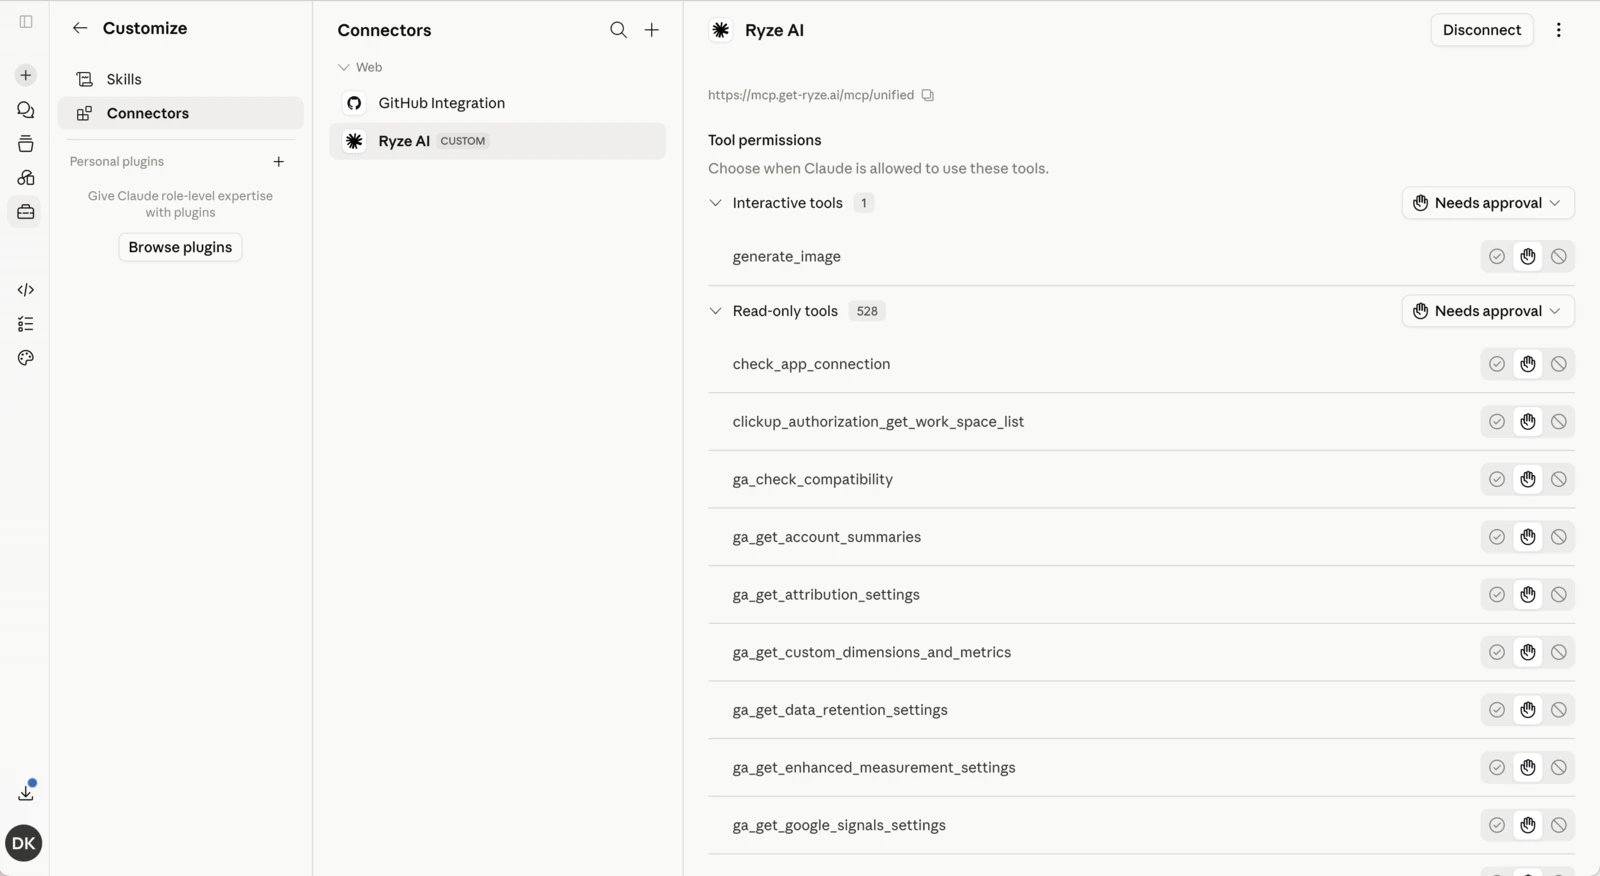
list my ad accountsIf it returns your accounts, you’re done. If it stalls, see the FAQ.